Host your ASP.NET Core app on Raspberry Pi Zero at home
with Nginx, Let's Encrypt, NoIP
Introduction
I was thinking of creating a simple website in ASP.NET core and host it somewhere.
At first, I planned to use the smallest Droplet at DigitalOcean which would cost $5/month.
Then I realized that I still have 01 Raspberry PI Zero (without Wifi).
Why not try to setup it to host an ASP.NET core website?
Preparation
Let's check what I have
- Raspberry PI Zero
- USB Wifi Dongle - Not Required for Raspberry PI Zero W
- USB Adapter cable (USB A 2.0 Female F to Micro USB Male) - Not Required for Raspberry PI Zero W
- Micro USB Cable (for power)
- USB Charger
- Micro SD Card 8GB
- Micro SD Card Reader
- Access to Wifi Router
1. Setup your RPiZero
What we will get: Raspberry Pi OS is up with SSH access via Wifi
Flash Raspberry Pi OS to Micro SD Card
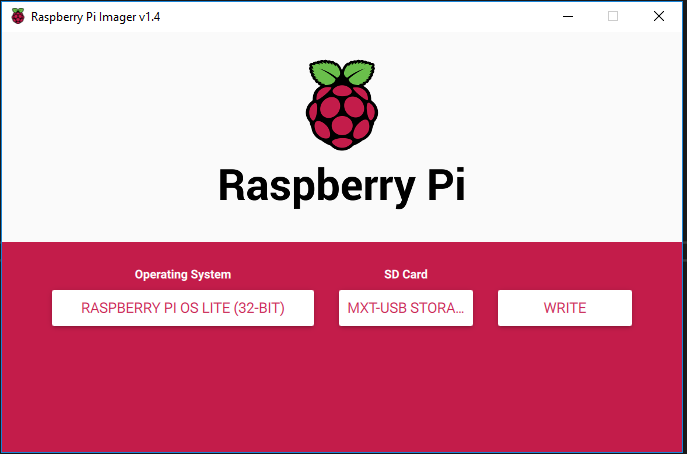
Download Raspberry Pi Imager from the official Raspbery PI website (https://www.raspberrypi.org/downloads/) and Flash the Raspberry Pi OS Lite to your micro SD Card
Enable SSH
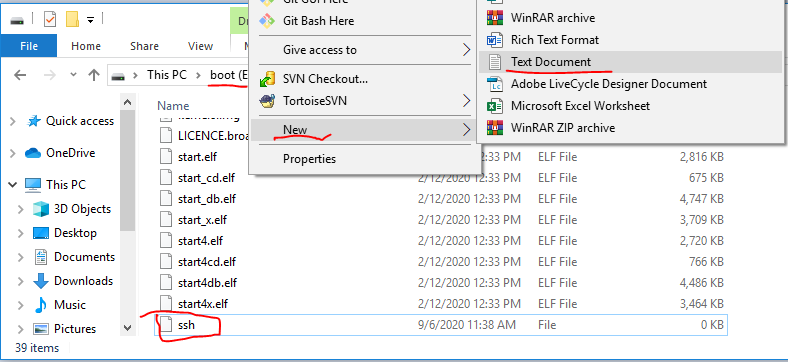
After the OS flashing is completed, open your SD Card (you may need to remove then insert it). You will see your SD card is named as 'boot'
To enable SSH on your RPiZero, just need to create an empty file 'ssh' (without extension) on the root of the SD Card
There are many ways to do that. What I did is right-click on the root folder, select New > Text Document then change the file name to 'ssh'
Enable Wifi
If you want to connect your RPiZero dirrect to your network via an Ethernet Adapter (USB) and Cable, you can skip this step
To enable and configure Wifi settings, we will need to create a text file and name it as 'wpa_supplicant.conf'.
We will store this file at root folder, the same way we did to enable ssh
Here is the content of the file. Remember to change Wifi name and password to your ones.
country=US
ctrl_interface=DIR=/var/run/wpa_supplicant GROUP=netdev
update_config=1

network={
	ssid="wifi_ssid"
	scan_ssid=1
	psk="wifi_password"
	key_mgmt=WPA-PSK
}
Configure Static IP Address for WLAN adapter (Optional)
If your RPiZero is without built-in Wifi and you want to use USB Wifi dongle, you may need to do this steps to get your wifi working (this is my case).
You will need a keyboard and a screen (HDMI) for this step.
Connect your RPiZero with SD Card, Screen, Keyboard, and power then let it starts.
The default user is pi, and the password is raspberry.
First, we need to disable 'predictable network interface'. The funny thing here is this will make the wireless interface name become 'wlan0' - predictable.
sudo raspi-config
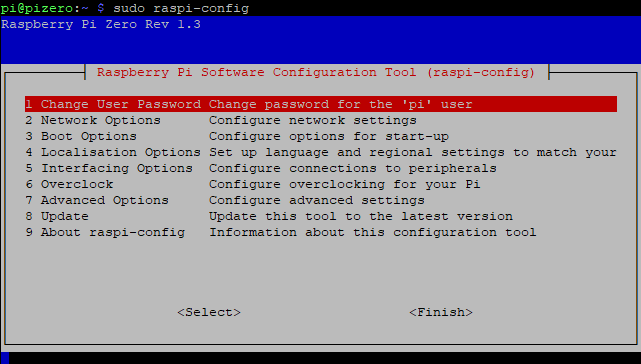
Select "2. Network Options" > "N3. Network Interface Name" > "No" > "OK"
Then, update dhcp config file '/etc/dhcpcd.conf'
sudo nano /etc/dhcpcd.conf
Add the lines to the end of file and save it (Ctrl-X)
interface wlan0
env ifwireless=1
env wpa_supplicant_driver=nl80211,wext
static ip_address=192.168.0.11/24
static routers=192.168.0.1
static domain_name_server=192.168.0.1 8.8.8.8
Access to your RPiZero via SSH
Connect your RPiZero with SD Card, and power then let it starts. It will take a few minutes on the first run. If everything goes well, the RPiZero will connect to your Wifi network with an IP Address.
If you didn't configure your RPiZero with a static IP address (as a previous step), you can find its IP address by accessing your Wifi Route or you can use an IP scan app to find it. Easy.
Now it's time to connect to your RPiZero via SSH. You can use any SSH software. I use PuTTY.
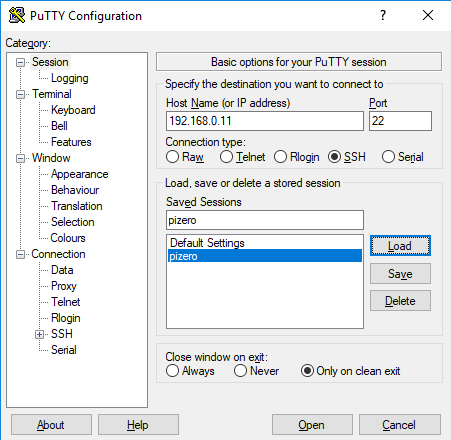
The default user is pi, and the password is raspberry.
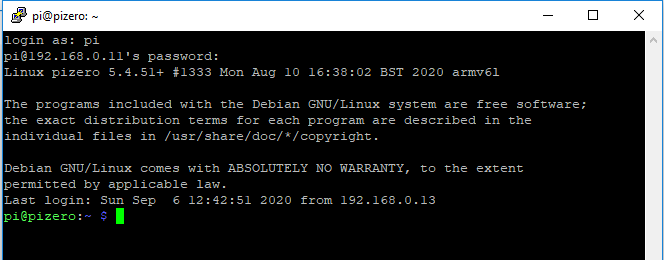
Congrats! Your RPiZero is up and running.
You can change the default password
passwd
2. Setup mono & run ASP.NET core app
You have setup RPiZero. It is now up and running. You are now able to access to your RPiZero via SSH.
Let's setup and run an ASP.NET core app
Install Mono
Run the command line below to install Mono on your RPiZero
sudo apt-get install mono-complete
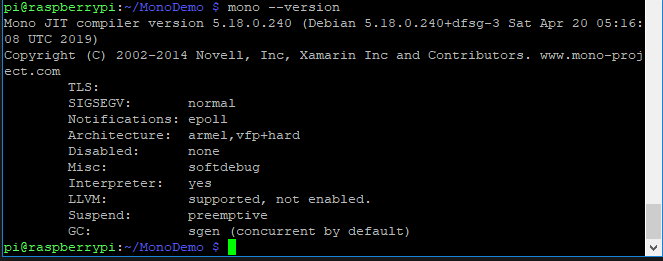
Check mono version
mono --version
Create ASP.NET Core project
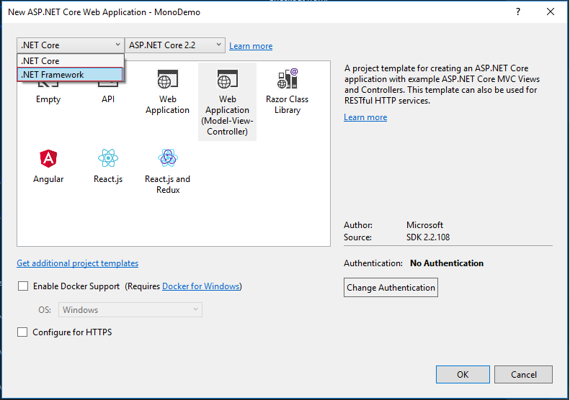
Start Visual Studio and Create ASP.NET Core Web Application
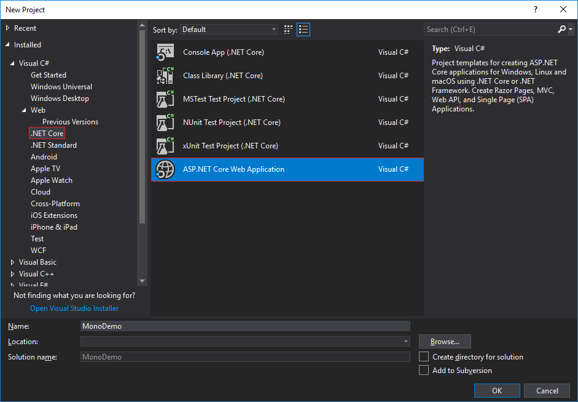
Select .NET Framework (not .NET Core)
Publish your app
Publish web application using .NET Core command
dotnet publish -r linux-x64 -c Release -f net461
Copy all files under the folder bin\Release\net461\linux-x64\publish\ to your a folder on your RPiZero, ex /home/pi/MonoDemo.
You can use FileZilla (sftp) to copy those files.
Run your app
Let's run your ASP.NET Core app
cd /home/pi/MonoDemo
sudo mono MonoDemo.exe --server.urls=http://*:80
The parameter --server.urls=http://*:80 is to ask your web app to listen on all interfaces, not just localhost

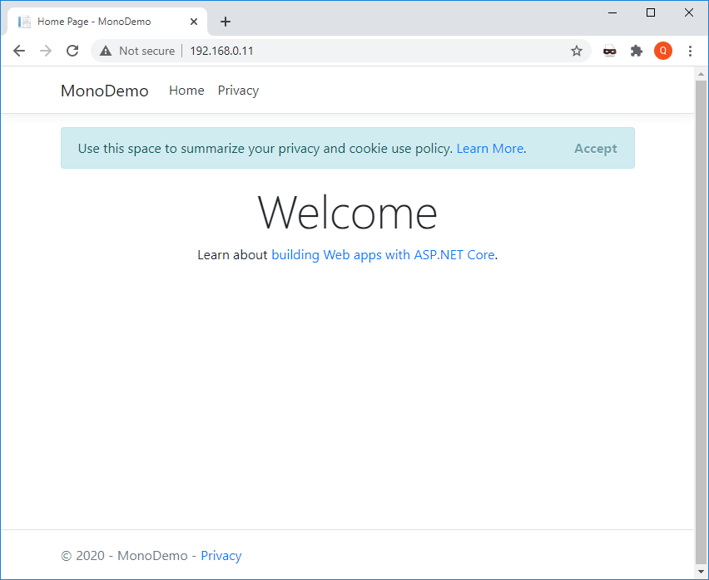
Open your browser, you should be able to access to your web app at http://[your-RPiZero-ip], ex: http://192.168.0.11
Run your web app as a service on startup
We don't want to run these command lines to start the web app every time we start up RPiZero. We can setup a service to start the web app on start up.
Run the commands below to create a new service. Let's call it 'mono-app'
sudo nano /etc/systemd/system/mono-app.service
Content of 'mono-app.service' will look like this
[Unit]
Description=mono app

[Service]
Type=Simple
ExecStart=/usr/bin/mono /home/pi/monodemo/MonoDemo.exe --server.urls=http://*:80
WorkingDirectory=/home/pi/monodemo

[Install]
WantedBy=multi-user.target
Press Ctrl-X to save and exit text editor
Reload services
sudo systemctl daemon-reload
sudo systemctl enable mono-app
Start/Stop or check Status of service
sudo systemctl start mono-app
sudo systemctl stop mono-app
sudo systemctl status mono-app
--or--
sudo service mono-app start
sudo service mono-app stop
sudo service mono-app status
3. Setup Portforwarding to access from outside
Setup Portforwarding on your Wifi Router
You need to get access to the control panel of your Wifi router. Each router model will have a different menu and UI for port forwarding however, the concept is similar as the screenshot below.
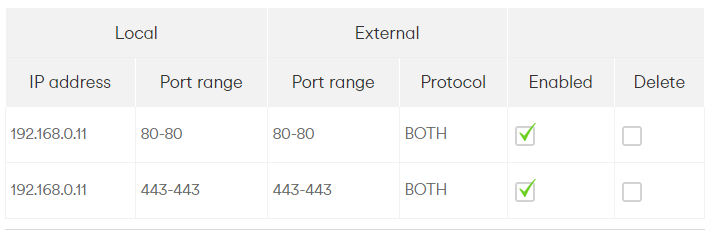
We will only need port 80 for now, port 443 will be used for HTTPS setting later
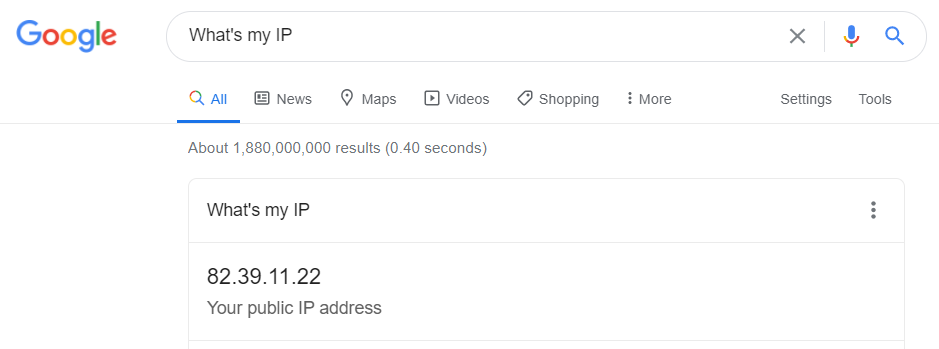
Get your public IP Address
the easiest way to find your IP address is to ask Google "What's my IP"
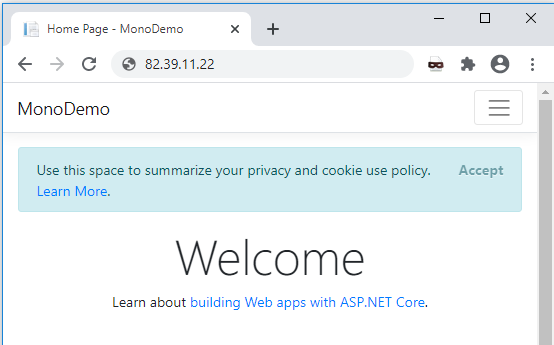
Now you can access to your Web App on RPiZero from internet http://[your-public-ip-address]
4. Setup NoIP Account and DUC
Why do we need to do this?
Usually, our home internet doesn't have a fixed public IP address. Unless you are paying for a premium service. So, every time we restart the internet router, it will be given a random public IP address. We need something more stable so that our web app can be accessed anytime. That is NoIP service.
Install DUC
NoIP gives us a client app (DUC - Dynamic DNS Update Client) which can help to check and update our public IP address to a free domain name. Let's register a domain name (https://www.noip.com).
Once you have got your domain name, you can proceed installing DUC on your RPiZero following this link
Run NoIP DUC as a service
Run the commands below to create a new service. Let's call it 'noip2'
sudo nano /etc/systemd/system/noip2.service
Content of 'noip2.service' will look like this
[Unit]
Description=noip2 service

[Service]
Type=forking
ExecStart=/usr/local/bin/noip2
Restart=always

[Install]
WantedBy=default.target
Press Ctrl-X to save and exit text editor
Reload services
sudo systemctl daemon-reload
sudo systemctl enable noip2
Start/Stop or check Status of service
sudo systemctl start noip2
sudo systemctl stop noip2
sudo systemctl status noip2
--or--
sudo service noip2 start
sudo service noip2 stop
sudo service noip2 status
5. Setup dns cname to link to no noip free domain
You may already have a better domain name. You can link your domain name to the free one from NoIP. This can be done easily with CNAME record. Check out the details here
6. HTTPS with NginX and Let'sEncrypt (CertBot)
Update your Web App to listen on different port, such as port 8080
Your Web app is running on port 80. NginX will need to use port 80 and 443 so we will change the web app to listen on port 8080 and later will ask Nginx to forward the request on port 80 to port 8080
sudo nano /etc/systemd/system/mono-app.service
Content of 'mono-app.service' will look like this
[Unit]
Description=mono app

[Service]
Type=Simple
ExecStart=/usr/bin/mono /home/pi/monodemo/MonoDemo.exe --server.urls=http://*:8080
WorkingDirectory=/home/pi/monodemo

[Install]
WantedBy=multi-user.target
Press Ctrl-X to save and exit text editor
Reload services
sudo systemctl daemon-reload
sudo systemctl restart mono-app
Install Nginx
sudo apt-get update
sudo apt-get install nginx
Install certbot
sudo apt-get install certbot
Create a Certificate
By default Nginx will use port 80. The command below will stop Nginx for a while to create the certificate. Certificate files will be created at /etc/letsencrypt/live/yourdomain.com
sudo certbot certonly --authenticator standalone -d yourdomain.com --pre-hook "service nginx stop" --post-hook "service nginx start"
Configure Nginx
Add a new site config to Nginx
sudo nano /etc/nginx/sites-enabled/yourdomain.com
Your Nginx config file will look like this
server {
  listen 80;
  server_name yourdomain.com;
  return 301 https://$host$request_uri;
}

server {
  listen 443;
  server_name yourdomain.com;
  ssl on;

  ssl_certificate /etc/letsencrypt/live/yourdomain.com/fullchain.pem;
  ssl_certificate_key /etc/letsencrypt/live/yourdomain.com/privkey.pem;

  ssl_session_timeout 1d;
  ssl_session_cache shared:SSL:50m;
  ssl_session_tickets off;
  ssl_protocols TLSv1.1 TLSv1.2;
  ssl_ciphers 'ECDHE-RSA-AES128-GCM-SHA256:ECDHE-ECDSA-AES128-GCM-SHA256:ECDHE-RSA-AES256-GCM-SHA384:ECDHE-ECDSA-AES256-GCM-SHA384:DHE-RSA-AES128-GCM-SHA256:DHE-DSS-AES128-GCM-SHA256:kEDH+AESGCM:ECDHE-RSA-AES128-SHA256:ECDHE-ECDSA-AES128-SHA256:ECDHE-RSA-AES128-SHA:ECDHE-ECDSA-AES128-SHA:ECDHE-RSA-AES256-SHA384:ECDHE-ECDSA-AES256-SHA384:ECDHE-RSA-AES256-SHA:ECDHE-ECDSA-AES256-SHA:DHE-RSA-AES128-SHA256:DHE-RSA-AES128-SHA:DHE-DSS-AES128-SHA256:DHE-RSA-AES256-SHA256:DHE-DSS-AES256-SHA:DHE-RSA-AES256-SHA:!aNULL:!eNULL:!EXPORT:!DES:!RC4:!3DES:!MD5:!PSK';
  ssl_prefer_server_ciphers on;
  ssl_stapling on;
  ssl_stapling_verify on;
  ssl_trusted_certificate /etc/letsencrypt/live/yourdomain.com/chain.pem;

  location / {
    proxy_pass http://localhost:8080;
  }
}
Auto-Renew the Certificate
The certificate is only valid for 90 days. That is why we need to setup Auto-Renew. Setup a cron job to run certbot command to renew the certificate
sudo crontab -e
Setup cron job to run every month
0 0 1 * * sudo certbot renew --pre-hook "service nginx stop" --post-hook "service nginx start"
Reference: https://webcodr.io/2018/02/nginx-reverse-proxy-on-raspberry-pi-with-lets-encrypt/
7. Firewall (Optional)
This is an additional step to secure your RPiZero following the guide from here https://www.raspberrypi.org/documentation/configuration/security.md
Install a firewall
sudo apt-get install ufw
Configure firewall
sudo ufw allow 22
sudo ufw allow 80
sudo ufw allow 443
sudo ufw enable
sudo ufw status
Finished
Congrats! Now you have your ASP.NET Core web application running on RPiZero securely.
Thanks for reading. Enjoy your time with your RPiZero